In our area the council will actually bring the grid power to our land for free and then charge only a small monthly fee to access it, but we decided that we prefer to have things set up independently for ourselves anyway so we can gain valuable experience in independent power solutions of many different kinds.
We don’t need much power as our main requirements are just for lighting, internet and laptops which is around 50W of power when all in use. I initially estimated that we’d be able to get by on about 600W hours of power per day, but after living here for a few months and doing the numbers it turned out that our average usage is actually a lot lower at around only 200 watt-hours per day!
We’ll be using solar for water heating, gas or fire for cooking, a water-wheel for pumping water to four or five meters height for some pressure, and we won’t be using a fridge because we have no dairy products and all our vegetables stay fresh by only picking them as we need them.
Our power consumption
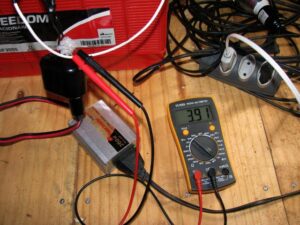
I’ve done some current measurements on our inverter while using different items to map how much power each thing uses. I attached the multimeter before the inverter so that the power the inverter consumes is also included in the results. Here’s a table of the items measured.
| Item | Current | Power |
|---|---|---|
| Nothing | ||
| Main “lounge” LED Light | 380mA | 4.56W |
| “Kitchen” LED Light | 600mA | 7.2W |
| “Office” LED Light | 270mA | 3.2W |
| Net (Hub & 3G router) | 700mA | 8.4W |
| Dell adapter | 310mA | 3.72W |
| Dell (on, not charging) | 1.45A | 17.4W |
| Dell (on, charging) | 2.45A | 29.4W |
| Dell (off, charging) | 1.13A | 13.56W |
| Dell (standby, not charging) | ? | ? |
| Lenovo adapter | 210mA | 2.52W |
| Lenovo (on, not charging) | 1.13A | 13.56W |
| Lenovo (on, charging) | 2.82A | 33.84W |
A couple of interesting things show up here, firstly, the inverter actually uses about 2W of power when nothing is being used, so it would be best to include a switch for that in a handy location so that we can turn it off throughout the night to save around 20 Watt-hours. It wastes less power when it’s being used as can be seen by the fact that our 4.2W light shows 4.56W being used which means the inverter is then only using 0.36W.
Update: We have a new inverter as of 2014 which is more reliable and higher power, but uses 8W. We have two switches one in the loft so we can easily turn it on and off at night.
The next surprising thing is that the computer power adapters also use a lot of power when not in use and so should not be plugged in if the computer batteries don’t need to be charged. My adapter consumes over 3.7W and Beth’s over 2.5W when not powering anything.
The charging of the computer batteries consumes a lot of power, but does so for less time than what it took the computer to use that power from its battery – how efficient this is we don’t know yet, but in general it’s best to avoid wasting the computer battery.
The power consumed by the computer in normal operation is actually quite a bit less than I was expecting, I thought it would be around 30-40W but is actually only 17.4W. The net hub and router are about what I was expecting at 8.4W, I estimated it should be under 10W.
On a typical day at the land we’d have the computer and net running for about six hours and the light running for around four hours, plus a few extra items such as charging and inverter power brings us to about 200 watt-hours per day for our current consumption.
Our power generation
On overcast days we’re only bringing in about 15W of power from the panels, but this is quite consistent for the full time of daylight since its mainly ambient light and not limited to the direction of the sun so much, so this equates to around 150 watt-hours in a day. This is a little less than we consume though so after a number of overcast days, which is quite common during winter, we get down to a critical level of power and have to go into power-rationing.
We’re going to have two more 150W panels soon which means we’ll have a total power input that’s triple what we currently have as of October 2013. This will mean that we’ll be brining in over 400 watt-hours on overcast days which is double what we consume, so even if we have weeks of very bad weather we should still be able to use our power normally.
Petrol generator
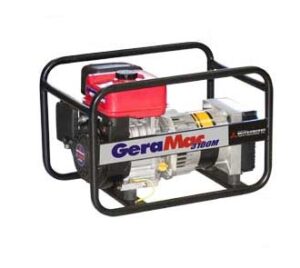
Petrol’s not exactly a sustainable independent solution! but having a few kilowatts available in a portable format can sometimes be invaluable especially in the early stages when other more independent solutions are not yet ready. Also a high power inverter is very expensive and we’re unlikely to be purchasing one for quite some time, if at all. So for when we need to use power tools, we use our GeraMac 3100M 3KW petrol generator which has a Mitsubishi engine made in Japan and cost about R$1000. It’s been really reliable and starts easily every time, even in very cold weather. It has output connections for 115vac, 230vac and 12vdc.
Solar panels (v1)
If we consider a worst-case of about four hours of sun per day (which is about right for winter in Rio Grande do Sul) and we want at least 600W hours of power per day then we need at least 150W of panels initially. I’d like to double this reasonably soon and eventually have 1KW of panels so that we can afford to be less frugal with our power, for example by beaing able to keep the computers running when we’re not using them so that we can receive incoming calls etc.
We started with a basic 152W kit like this (I also found this one which is a bit cheaper). Building our own panels from the a kit of individual cells gets the price down to around R$2.40 per Watt which is about half of the best prices available in Brazil for ready-made solar panels. For more detail on the process of building the panels, and the different design revisions we’ve gone through, see Building our solar panels.
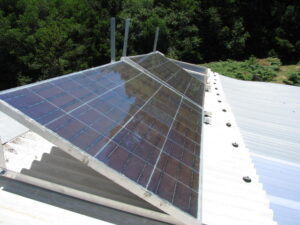
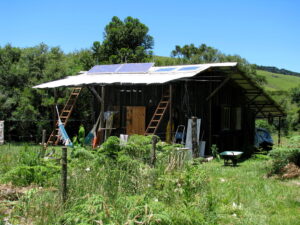
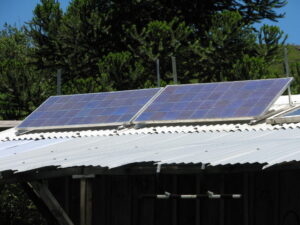
We currently have two 75 watt panels and two 150W panels, these can be wired up as two 30 volt sources in parallel, or as three 20 volt sources in parallel. The former is more optimal for very dark winter days because the output voltage drops down to about 60% which is too low to charge a 12 volt battery properly. But it is not optimal for brighter days, because the charge controller chops off all the power above the voltage it needs (this wouldn’t be an issue if we had a more expensive MPPT controller – details below).
Charge controller
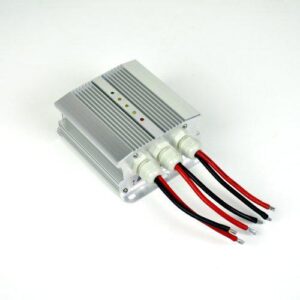
The sources of power such as the solar panels don’t connect straight to the battery because this can damage the battery if it’s already fully charged, or if the voltage coming from the panels is too high or too low. So instead the power sources must first connect to a charge controller which assesses both the source power and the battery state and conditions the power to the battery’s requirements. Charge controllers have two terminals to connect to the power source, two for the battery and most have another two for the load (i.e. the equipment you want to run). The reason for the separate load connections is so that the charge controller can completely disconnect the battery from the circuit if it’s fully charged, but still supply a high current to the load.
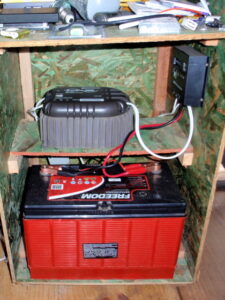
Our charge controller is the SML-60 from MovTec here in Curitiba (Rua Carmem Maito Stinglin, 80, ph. 30145114). We decided on the SML-60 because we’ll be running a 12V system which means that the SML-25 would only be able to handle 300W which is less than another one of our current 152W sets of cells. The SML-60 can handle 720W which means four of or 152W modules will be no problem at all for the unit to handle.
I think that sometime in the near future it would be worth investing in the more expensive MPPT type of charge controller because then we can efficiently utilise power from any source regardless of the voltage (as well as getting the most out of our solar cell’s output as well). Not only does an MPPT charge controller ensure that no portion of the input power is wasted, it also dynamically tests the characteristics of the panel which changes as the light conditions change to ensure that the current and voltage being drawn from the panel are at the most optimal efficiency – i.e. the Maximum Power Point.
Our charge controller is giving incorrect results for the battery state, it seems to be showing the input state instead and is also affected by the amount of output being drawn. The manual is not very helpful and seems to have a section missing which is supposed to describe how to configure it by setting the jumpers inside. I found this manual which has a similar circuit board with the same jumpers, so I’ll try basing the configuration on that one – if it’s correct then it shows that two of our jumpers need to be changed, the first was set to gel battery type instead of fluid, and the second to voltage-controlled disconnect instead of state-of-charge controlled.
I was going to build a build my own MPPT charge controller using a Raspberry Pi based on this DIY Arduino-based MPPT charge controller project, but first the Pi got lost in the post, and secondly there is a huge amount of discussion on the charge controller mailing list suggesting that the design is not completely functional. So for now we’ve bought a new PWM controller so at least we have a backup if one should fail.
Battery
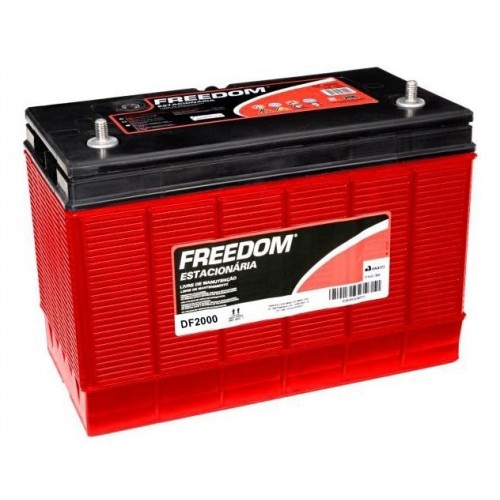
We’ve been looking for a battery suitable for using with our solar panel and whatever other sources of pwer we end up using and the charge controller, but we’ve had a lot of trouble finding anything for a practical price. Then when we were going to a cafe to meet one of Beth’s friends we saw a small battery shop on the other side of the road, so we decided to pop in and ask if they had anything, or if not, if they knew of anywhere we could go. Well it turned out that the place was actually very large inside and had a huge range of batteries including the exact kind we were looking for at a good price 🙂 and better still it turns out that the owner travels to Canela each weekend and said he can drop it off at the Pensão for us! This was really good luck because it weights over 27Kg and batteries require a special expensive courier service to transport. We got a 115Ah Freedom DF2000 battery for R$440. The DF2000 is a fluid electrolyte battery which allows for better thermal dissipation and are less sensitive to temperature variation than gel (VRLA) batteries.
Do’s and dont’s
- Do get a flooded lead-acid battery not a VRLA (AGM/Gel) so you can open to test it’s state and add water
- Do have your battery 100% charged on a regular basis
- Ensure you have enough panels for the battery to be regularly fully charged or it will die quickly
- overcharging leads to positive terminal corrosion but takes many years, undercharging to sulfation which can kill a battery in a year
- keep your batteries watered (I don’t know how to do that yet)
- The best test of state is specific gravity of the liquid (I don’t know how to do that yet)
Power inverter
Since most normal lighting and appliances such as laptops, phone chargers and routers all run off 110 or 220 volts AC, we need an “inverter” to convert to this high AC voltage from the 12 volts DC coming from the battery. There’s quite a range of inverters available from very cheap to very expensive. The most expensive ones are required if you need very high power and/or very perfect “pure sine” wave-form in your output – pure sine also helps to lengthen the life of equipment and makes power components such as transformers run at optimal efficiency.
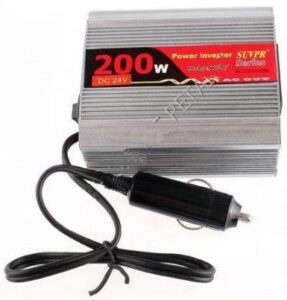
We started with a cheap 200W inverter from dx.com for only US$20 and free delivery to Brazil. This was fine for our basic requirements, and for the rare times that we need to use power tools, we can use the generator. Most of these cheap ones come with a car cigarette-lighter plug for input because they’re designed to be used in the car so you can charge your laptop or phone when you’re on the road. We have a cigarette-lighter socket which we’ll attach to our battery so that we can easily unplug the inverter and take it with us in the car if we ever need to.
In August 2013 we decided to get an 800W inverter as well firstly as a backup in case our current one blows up (we also got a second charge controller). But also we’ve found that we use the drill very often and the jigsaw quite often too, and small tasks become a major hassle when you have to lift the generator out of the packed trailer and stretch long extension cables into the house from it etc. The problem with a higher power inverter though is that they use more standby power. Our 200W inverter uses less than 2W for itself (and less if you’re using some load), whereas the new 800W inverter uses 12W, so we use the 200W for most purposes, but have the 800W permanently connected with it’s own extension cord so it’s easy to switch on whenever we need it. There are very efficient high-power inverters available, but they’re extremely expensive.
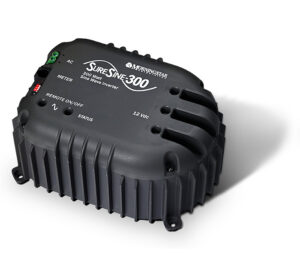
In February 2014 our 800W inverter blew up and I had to replace some of the capacitors in it. That got it working again, but I decided that we really needed a professional quality inverter designed for solar purposes rather than a cheap one made for using in the car when travelling (you get what you pay for!). Since Mum & Dad were visiting at the end of the month I decided to buy a decent one in NZ which is a lot cheaper than here in Brazil. I got a SureSine 300W (600W for ten minutes) made by Morning Star which is the best company in the business 🙂 The right-hand picture above shows this new one.
Unfortunately we still can’t use our power tools or the spinner dryer with the new inverter, because tools that have motors in them peak at about three times their rated power for a fraction of a second, and the new inverter is absolutely unforgiving on its 600 watt limit.
Wind & Water
We’ll eventually get a small wind turbine and water wheel set up, but we’ll start with the solar and work on these later. The common factor in both of these is the generator. I want to get in to building my own after I downloaded Energy Creator‘s DVD and found that building really efficient generators of a few hundred watts of power is totally doable and quite cheap.
Tesla coils
After reading some of the 2600 page Practical Guide to Free-Energy Devices eBook, I really want to try some of the simpler designs out for myself.
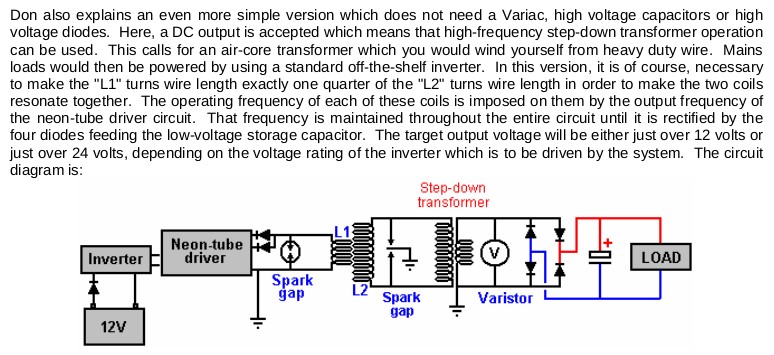
The first being one of Don Smith’s designs on page 236:
The second is another of Don Smith’s designs on page 248:
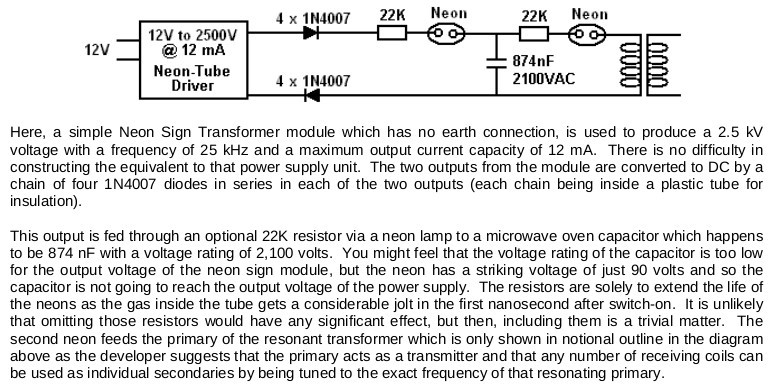
Tesla aerials
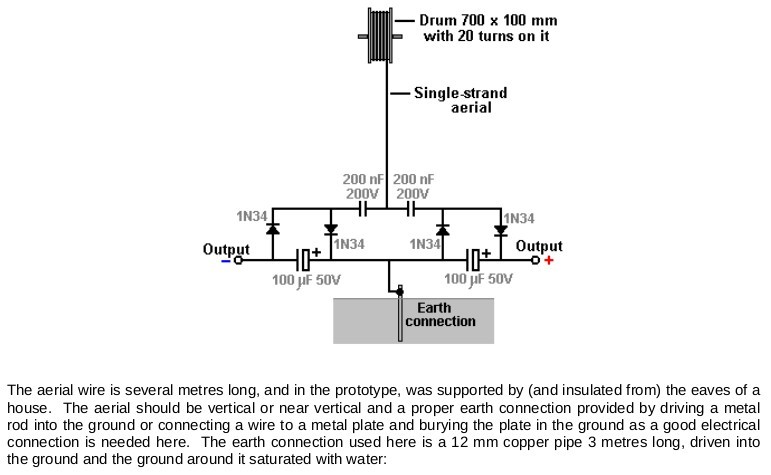
And I’ve always found the Tesla Aerials pretty interesting which are discussed starting on page 586.
Lessons learned
- You need a really good inverter like a Morning Star SureSine, not just a cheap car inverter as these will shorten the life of your equipment and reduce their operating efficiency.
- If you use anything that has a motor in it (fridges, power tools, blenders, coffee grinders, hair dryers etc etc), then you need to multiply the power rating of the item by three to determine how much power your inverter will need to supply, because when motors start up they consume three times their rated power for a fraction of a second. This will cause a cheap inverters parts to sustain damage, and a good inverter to temporarily disconnect the power.
- A normal AGM battery will last about four or five years, and this is a gradual degradation process, so if you have a 100Ah battery, you’ll have something like half that after a two or three years of use. Furthermore the charge controller won’t let the battery discharge to less than about half capacity, so in practice your 100Ah battery may only be giving you around 25Ah after a couple of years.
See also
- New solar system
- Building our solar panels
- Moving on to our land
- Our rural net connection
- Energy
- Technology
- Gravity light – cool crowd-sourcing project for creating lighting from a lifted weight
- LED over 100% efficient
Brazilian Firm Goes To Market With Free Energy Generator Capable of Powering Two Average Size Houses- Next generation solar cells on the way
- Low power (<30W) 13L fridge/freezer
- Multiple Scientists Confirm The Reality of Free Energy – Here’s The Proof
Hemp nanosheets might topple graphene to make supercapacitors- Soil lamp
- Who Stole Fire From Mankind? The Suppression of Fusion
- Cold fusion alive and kicking
- The coming blackout epidemic
- Scientists predict green energy revolution after incredible new graphene discoveries
- Power LED and other interesting circuits
- New clay-based energy storage
- Blacklight Power – water powered fuel cell
- Next generation batteries & Perovskite solar cells
